


Web Page VIDEO Tutorial
Adding Video to your Webpages
 This lesson will assume that you have studied HTML at one or more of my recommended Design Sites
and here I will show you how to create and add Video to your webpages!
This lesson will assume that you have studied HTML at one or more of my recommended Design Sites
and here I will show you how to create and add Video to your webpages!
There are three parts to this tutorial... (1) How to actually create a Video (2) How to upload it to your PC and (3) How to code your webpage to show the Video...
Part 1: How to Create a Video
 You need a Camera (with Video Capability) to make a Video, and small Digitals are the best choice... there are TWO Basic types of Cameras... Digital or Analog, either will work, and Analog Cameras are cheaper, but they are being replaced with newer Digital Units. When you shoot your Video, you must keep the length as short as possible, because the File Size can become quite LARGE for lengthy Videos, and users on a Slow Connection, might not wait forever for them to load! A good rule of thumb is: For every 30 seconds of footage, the file size will increase by 3 Megabytes! In the case of an Analog Camcorder, make sure that it has Audio and Video output jacks, and for Digital Cameras, I recommend Sony units with standard USB Cable upload features...!
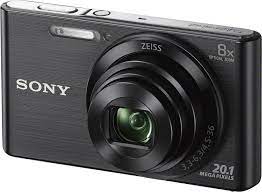
For all of my work I use a simple Sony (pocket size) DSC-W830 Camera...
Part 2: How to Upload your Video Movie to your Windows OS PC
For Digital Cameras you will need a USB Cable and video capture software, both of which usually come with the purchase of a new Digital Camera...
This tutorial will concentrate on Digital Cameras, using the Sony DSC-W830 Camera...
This Camera comes with all the necessary Software needed to capture your video, so go ahead and upload it to your PC... alternately you can search Google for your software... as well as a User Manual for your Camera!
There are many Video Editing Software Programs available today... you can look at www.Download.com and see what's available... and your Windows Based PC probably comes with one pre-installed, Windows Video Editor if you are using Windows 10 (Operating System)... so you can go ahead and use it if you want... study the "Help" sections... when you capture your video, edit it and save it to your computer... For Info On Windows Video Editor Go Here ... and also here is a very good Youtube Tutorial to help you along Look Here or just SEARCH GOOGLE for "tutorial on windows video editor" I recommend that you use Windows Video Editor to do your Video Editing work, but the choice is up to you...
Here is another FREE ONLINE Resourse for Editing Videos: Kapwing.Com
So after you shoot your Video, follow the Camera Instructions to Upload it to your PC...
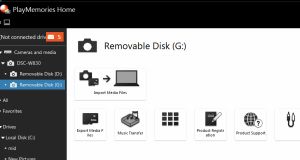
Here is the program that I use for our Sony Camera (Play Memories Home):
Now you can turn OFF your Camera, disconnect the USB Cable and get ready to Edit your Video using the Software of your choice... BUT WAIT... if the current file type is NOT viewable on Windows Video Editor... here is an Excellent Free ONLINE Program to convert File Formats to any other one of your choice... so that you can use it for whatever Editing Program or Movie Player that you like! However I now STRONGLY RECOMMEND that you convert the file first to .mp4 ... so that you can use Windows Video Editor for editing...
After you have changed the file type to ".mp4" and used your Video Editing Program (I recommend Windows Video Editor) to Edit and save the new Video to your PC, then continue on to Part 3 of this Tutorial...