


| editing | redirect | scrolling |
| slide show |
spacing | ssi |
| tabs | highlites | thumbs |
| titles | transitions | typing |
| vert lines | view source | videos |
| flip image | to top | pop ups |

Page Editing
Using a Text Editor on your PC to edit your HTML Documents is fairly easy and I have written a Text Editing Tutorial to help you... Good Luck!
To have a user Redirected Automatically to another page is best accomplished by using a Server Redirect via .htaccess files, rather than using the other client-side methods explained below! For info on this please Look Here
To have a user Redirected using the META tag in your HEAD section... which is a client-side Redirect (ie it's done on the user's Browser):
Just add this META tag to your HEAD section:
<meta http-equiv="refresh" content= "10;url=http://addy of redirected page">
Change the 10 to whatever number of seconds you want to wait before redirect begins!
Another client-side method using JavaScript will redirect the user automatically without any waiting... put this into your Head section:
<script>
<!--
window.location="http://someplace.com";
//-->
</script>
For Internet Explorer Browsers, you can Color the Scroll Bars (other Browsers will not see these), just by adding a simple Style Code to your <head> section... you can "brighten-up" your pages:
<style>
body, html { scrollbar-arrow-color:#0000cc;
scrollbar-face-color:#c7d0e0;
scrollbar-track-color:#e7f0fa;
scrollbar-highlight-color:#e0e7f7;
scrollbar-3dlight-color:#e0e7f7;
scrollbar-shadow-color:#6699cc;
scrollbar-darkshadow-color:#003366; }
</style>
 Refer to the Image at the right...
Arrow-Color ... [red]
Face-Color ... [green]
Track-Color ... [gray]
Highlight-Color ... [lighter blue]
3DLight-Color ... [darker blue]
Shadow-Color ... [lighter brown]
Darkshadow-Color ... [darker brown]
Change the Colors to suit your page style...
Want to make a SlideShow
where pics or images rotate automatically...
SEE EXAMPLE
Put this code into your HEAD section and replace the values of image URL's with your own values!
<script>
Begin var timeDelay = 5; // change delay time in seconds
var Pix = new Array
("http://davmagic.com/images/ pic/pictony.jpg"
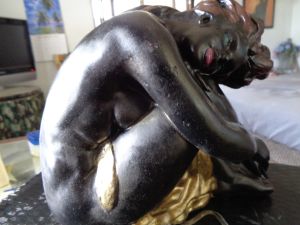
,"http://davmagic.com/images/ pic/picantiques.jpg"
,"http://davmagic.com/images/ pic/picentrance.jpg"
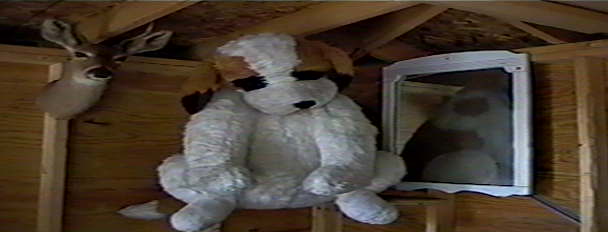
,"http://davmagic.com/images/ pic/picdog.jpg"
); var howMany = Pix.length;
timeDelay *= 1000;
var PicCurrentNum = 0;
var PicCurrent = new Image();
PicCurrent.src = Pix[PicCurrentNum];
function startPix() {
setInterval("slideshow()", timeDelay);
}
function slideshow() {
PicCurrentNum++;
if (PicCurrentNum == howMany) {
PicCurrentNum = 0;
}
PicCurrent.src = Pix[PicCurrentNum];
document["ChangingPix"].src = PicCurrent.src;}
image1 = new Image();
image1.src = "http://davmagic.com/images/ pic/pictony.jpg";
image2 = new Image();
image2.src = "http://davmagic.com/images/ pic/picantiques.jpg";
image3 = new Image();
image3.src = "http://davmagic.com/images/ pic/picentrance.jpg";
image4 = new Image();
image4.src = "http://davmagic.com/images/ pic/picdog.jpg";
</script>
Now put this code into your
BODY section where you want the SlideShow to take place
(you should make all images the SAME size):
<img name="ChangingPix" src="your pic1.jpg" alt="image" >
And finally make this your Body Line of Code:
<body onLoad="startPix()">
This SlideShow should work on all browsers with JavaScript enabled!
You can find many Free Slideshow Scripts at W3 Schools
Even if you're using Tables to control page layout, you still need to be able to space blocks of text or images on a page or in a table cell...
You can string out a bunch
of (non breaking spaces codes) for only horizontal
control, but a better way is to use an "invisible single pixel gif"
and place it by using the image tag and control the space by using
the attributes width and height...example:
I just inserted a spacial block 100x100 pixels aligned to the left
of this text cell and here is the code I used (note the dotclear
single pixel gif is stored at my images files):
<img src="/images/dotclear.gif" style="width:100px;height:75px;" alt="image">
To get your own gif, use: My Image Tutorial
SSI....Server Side Include...Let's say for example that you have a lot of pages that all have the same thing on them...say it's a Table of links to your other pages. Now if you want to add to or change that Table, you would have to go to each page and make the change...but using SSI (IF your host server allows it to be used) you can rename those pages to a file name ending in ( .shtml ) and take out the Table on all of the pages and replace it with this SSI Directive...
<!--#include virtual="page.txt" -->
Where page.txt is a new text file that you create which has (only) the Table code on it!
This text file should be in the same directory as your .shtml file...now what happens is when the browser reads the .shtml extension of your ( RENAMED ) page URL, it looks for SSI Directives and INSERTS the page.txt file at that position (removing the SSI Directive)...
This is of course only possible IF your server allows it...to test it...go ahead and try it...if it works then you are in luck and will save countless hours of coding because you now only have to change one page (the page.txt ) and the rest is done by your server! The idea is obviously that you can ORIGINALLY build your pages this way and use SSI from the get-go!
NOTE: If you do this as a fix...don't forget to change any links that point to those renamed pages so that they read (.shtml)...or else you'll have a bunch of Dead Links on your hands!!!
IMPORTANT NOTE: It is also possible to use an .htaccess file and add info to it so that you don't need to rename any files to .shtml... SEE THIS PAGE: This Page
To make custom designed Tab style Navigation, like the kind I use on my pages... (here are two EXAMPLES):


...You need to Study the Technique Here and Here ... the advantages are fantastic... cross browser compatable, and liquid for text size and resolution changes! Only three images are required for any set of tabs...
Here's a CSS code using the "style" attribute which will add a background color to text or to just one word in a text line!
Just put this code into the line:
<span style="background-color: #ffcccc">text here</span>
Use the color name or hexadecimal number preceeded by "#" and adjust your font color to show over it...and don't miss the "colon" or it won't work!
A Thumbnail Image is just a smaller sized Image which when clicked on, will take you to either the full sized Image or to any other location...
Click this Example Thumbnail to see what I mean:
A quick way to make a Thumbnail is to use this code:
<a href="URL Of Image Here"><img src="URL Of Image Here" style="width:70px;height:50px;"></a>
You can use the same URL for both tags and you can vary the values for width and height...
But to get the Thumbnail to load faster you really should take the original Image and Optimize it (reduce the file size) and Reduce it's overall size (height and width) and get a different URL for this Resized (Smaller) Image and use this URL in the Image Tag in the above code!
<a href="URL Of Image Here"><img src="URL Of Optimized Image Here" style="width:70px;height:50px;"></a>
You can find Free Image Sites to do this Optimization at My Design Links Page
By adding the TITLE ATTRIBUTE with a corresponding VALUE to any anchor tag, you can cause PC Browsers to show this value text in a tiny pop-up window (like a "tool tip") next to the link as the mouse points to it... See EXAMPLE BELOW:
And here's the code:
<a title="Our Front Page" href="/index.html">Davmagic.Com</a>
For PC Users using IE (Internet Explorer) you can add this code to your HEAD Section, which will cause the page to open in a special way, by sliding open from the left or from the right etc. (many possibilities):
<meta http-equiv="Page-Enter" content="revealTrans(Duration=?, Transition=?)">
Change the "?" after "Duration" to the Number of SECONDS that you want the Transition to last... and change the "?" after "Transition" to the Number for the Transition EFFECT that you want from the list on THIS PAGE ...
To make business cards, letterheads, letters, resumés, labels, fliers and more...you simply use HTML tables to build a page this then configures the page so that you can print it out when you goto it online with your web browser and receive your business cards etc. which you can cut out with a paper cutter if necessary (use heavier paper for cards)... you can build a page using any text editor on your PC too... SEE My Tutorial for more info...
It's all so simple once you learn HTML tables, fonts, colors etc.
Just create a new page and in the body section, build an HTML table to produce a page of say 10 copies of business cards for example...then print the page and there you have it! NOTE: You will have to experiment a bit depending on WHAT PRINTER you are using!
Do the same thing on a new page for resumés, letterheads, labels, greeting cards, letters, fliers etc. NOTE: You don't always have to use tables to layout the page ...for a Flier for example you can simply write out the whole page and adjust your font sizes and colors and go ahead and print it! Then take it up to a 5 cent copy machine and make copies...copy your letterheads and other documents this way too!
You can view my page which prints out business cards for my AllusedFurniture.Com Site... Go ahead and print the page to see how it comes out... NOTE: It is set-up to print on a HP 3630 All-In-One Printer, so it might not print correctly on your printer...
NOTE: You will have to fiddle around with your HTML table cells to get the printed page to result in the correct size for your cards based on WHAT PRINTER you have... same thing is true for letter heads etc.
There are many PC Software Programs that can be used on a PC to Print Business Cards, Fliers etc. but using HTML is just a different way to accomplish the same thing!
For a quick lesson on Tables GO HERE
To make Vertical Lines there are a couple of methods...
Use a Table code and add an invisible single pixel gif to a cell and use the Image attributes width and height... you can COLOR the line too by using the table data attribute "background-color"...
|
<table style="border-spacing:0px;padding:0px;"><tr><td style="width:2px;background-color:green;"><img src="/images/dotclear.gif" style="width:2px;height:150px;"></td></tr></table>
Another way is to use a single pixel gif of the color you want which you have made and saved in your Image files... use the image attributes width and height to control the line...

<img src="/images/dotred.gif" style="width:10px;height:75px;">
For PC users using Windows OS... just Right Click on an OPEN PLACE on the page... and then hit "View Source" in the window that opens... you will then get a new window that opens in Note Pad that will show the entire HTML Source Code for that webpage...
 How To View Source For A Webpage

Creating and adding a Video to play on your webpage is thoroughly discussed at my VIDEO Tutorial ...enjoy!
Making an Image FLIP to another Image when mouseover or hover is discussed at this W3C Tutorial ...enjoy!
Note for this to work on touch screen (smartphones etc) you need to Tap within the Image... then Tap outside of it, to get the result...
Here is an EXAMPLE:

tap above image to FLIP back
Look to the top of page... you can make this by studing the code at W3C Tutorial ...enjoy!
You can find more info at This Web Site
Add this to your HEAD Section: <link rel="stylesheet" href="http://www.jacklmoore.com/
colorbox/example1/colorbox.css">
Then Add this to your BODY Section: <script src="http://ajax.googleapis.com/
ajax/libs/jquery/1.9.1/jquery.min.js"></script>
<script src="http://www.jacklmoore.com/
colorbox/jquery.colorbox.js"></script>
<script>
function openColorBox(){
$.colorbox({iframe:true, width:"95%", height:"45%", href: "URL of Your Page Here"});
}
setTimeout(openColorBox, 5000);
</script>
Adjust the Width and Height and URL of your page, and timing (5000 = 5 seconds) to suit your needs...
If you don't like Pop Ups on page load... here is another Free Script From Dynamic Drive which your content Pops Up when the user moves their mouse out of the browser window (as if to exit the page) AND this script will work on Mobile Browsers as well, (but slightly differently)... Click Here